10 Steps to Create an Impressive Architecture Portfolio
Designing a portfolio can feel overwhelming—especially when you’re juggling deadlines, job applications, and a long list of projects. But if you break it into steps, the process becomes far more manageable—and even enjoyable.
Here’s a clear roadmap to guide you from gathering content to exporting a polished portfolio ready to impress.
1. Gather Your Content
Before you start designing, collect all the material you might include:
Final project images
Process sketches and diagrams
Plans, sections, and elevations
Model photos
Competition or personal projects
Pro Tip: Gather more than you need—you can refine later. Having options makes editing easier.
2. Select Your Best Work
Not every project belongs in your portfolio. Be selective and aim for quality over quantity.
6–8 projects are ideal for a student portfolio.
Include a variety of work to show range.
Leave out projects that don’t strengthen your overall presentation.
Pro Tip: If you’re applying to a specific office, prioritize projects that align with their aesthetic or focus.
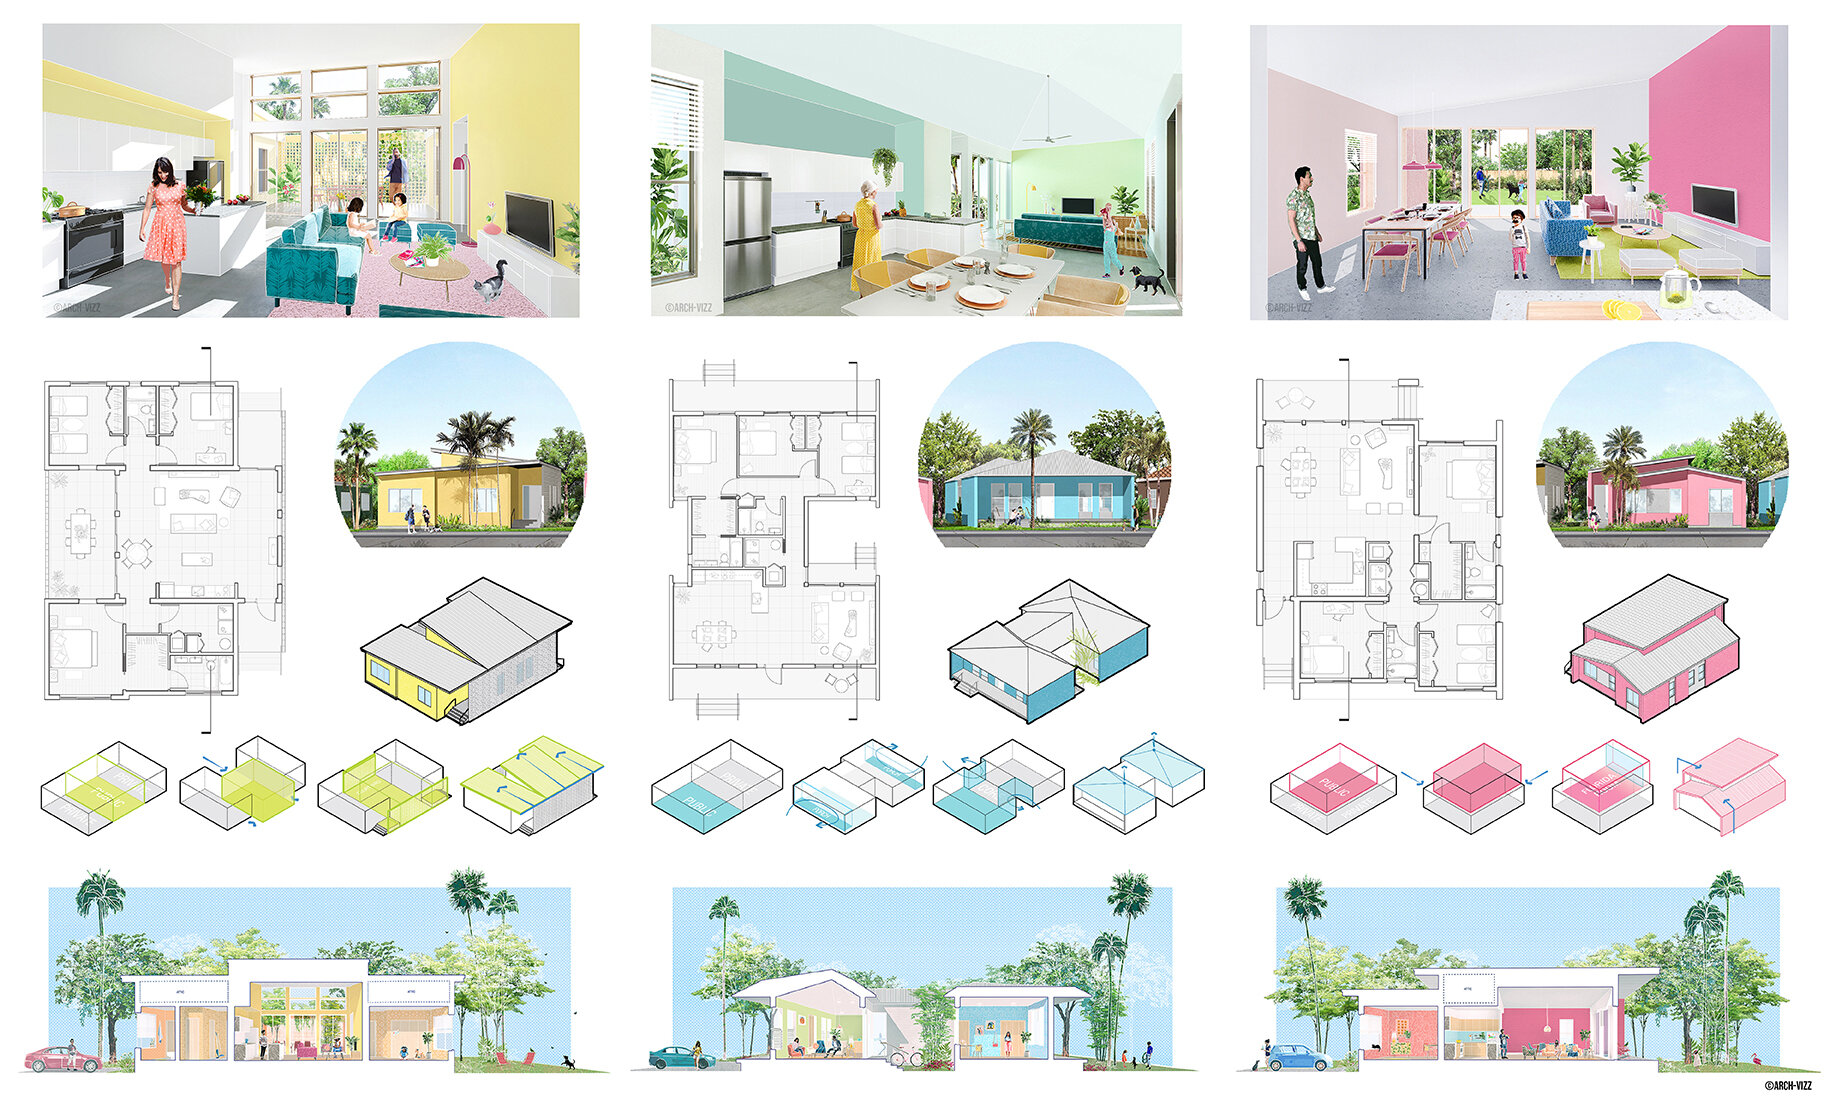
Example of drawings from a project, organized by category: Renderings, plans, elevations, diagrams and sections (by ©StefaniFachini).
3. Define the Story
Your portfolio should read like a story, not just a collection of pages.
Decide whether to arrange projects chronologically, by type, or by theme.
Consider what the sequence says about your development and skills.
Pro Tip: Write a short “about me” blurb before designing—it will help keep your tone and direction consistent.
4. Sequence for Impact
The order you present your work in is just as important as the work itself.
Start with your strongest project to capture attention.
Place another strong project in the middle to maintain interest.
End with something polished and memorable.
Pro Tip: Avoid ending with your weakest work—it’s what the viewer will remember most.
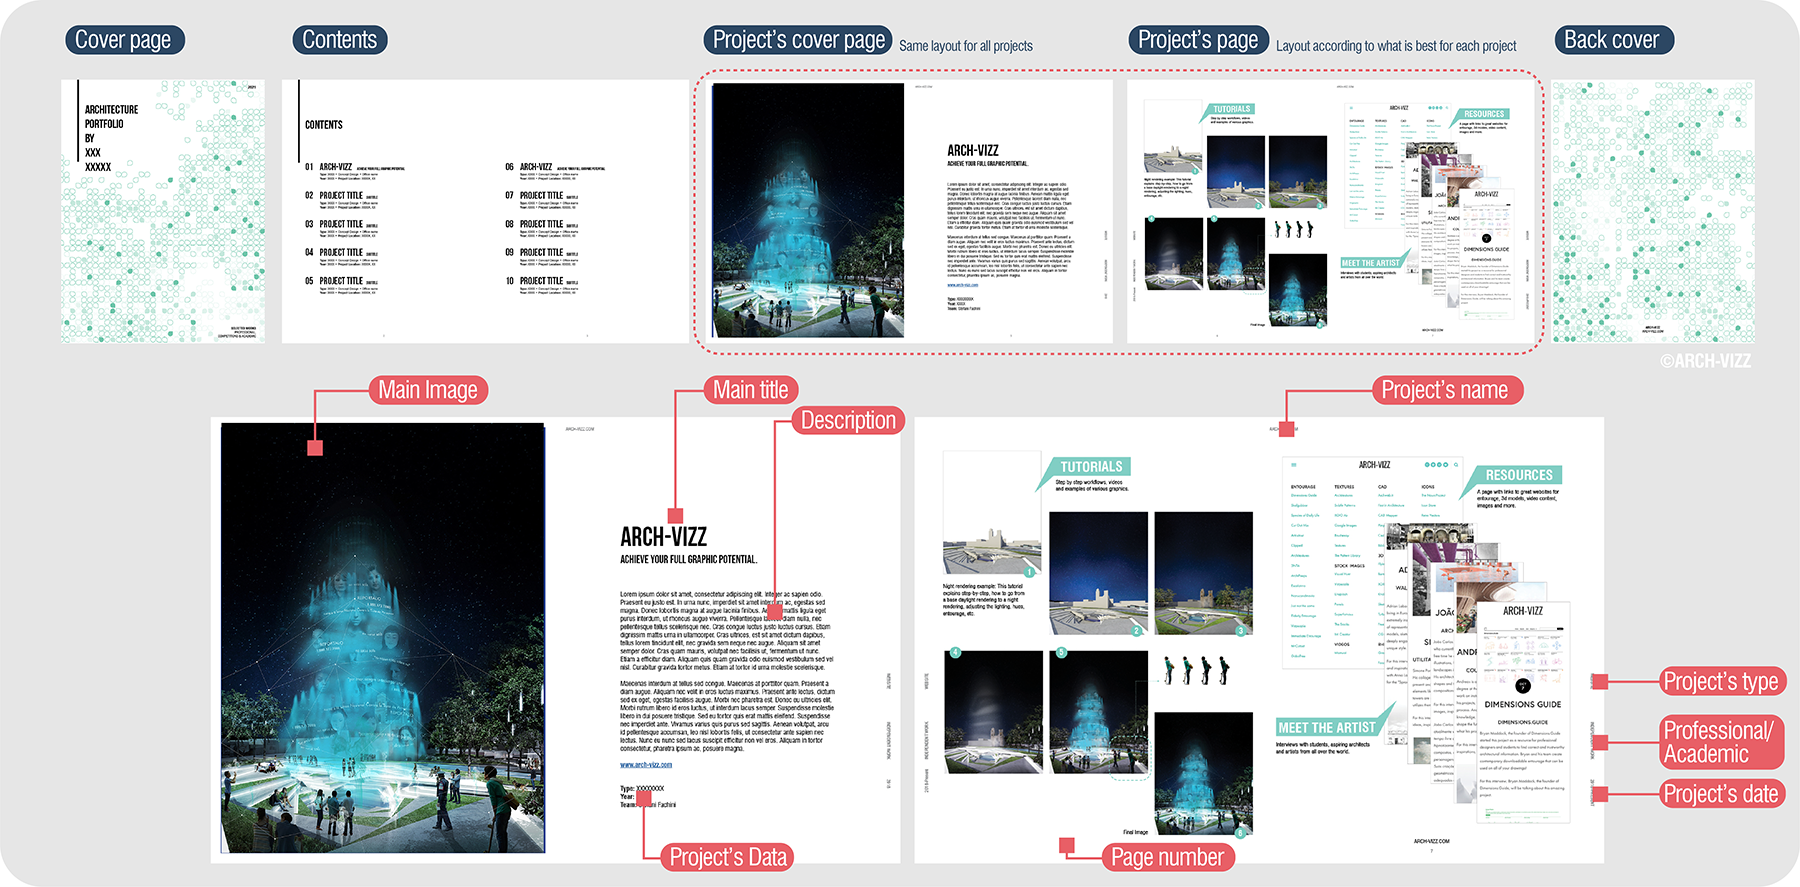
Example of Portfolio graphics template (by ©StefaniFachini).
5. Portfolio Structure
Before importing images, lay out the framework of your portfolio. This is when you design your cover, table of contents, and resume page (if you choose to include one). These pages should match the visual style and graphic choices you’ll use throughout—consistency is key.
A typical portfolio flow includes:
Cover Page – Your name and a strong visual.
Table of Contents – Optional for short portfolios but useful for longer ones.
Projects – Ordered according to your chosen sequence.
CV / Resume – Keep it concise and visually aligned with the portfolio style.
Contact Information – Make it easy for people to reach you.
Pro Tip: For digital portfolios, consider adding clickable links in your table of contents for quick navigation.
6. Design the Layout
Once you’ve set your structure, it’s time to design the pages.
Stick to a consistent grid and margins.
Use one or two fonts for cohesion.
Keep layouts clean so the focus stays on your work.
Pro Tip: Decide early whether your portfolio will be horizontal or vertical—this affects how drawings, panoramas, and images will fit.

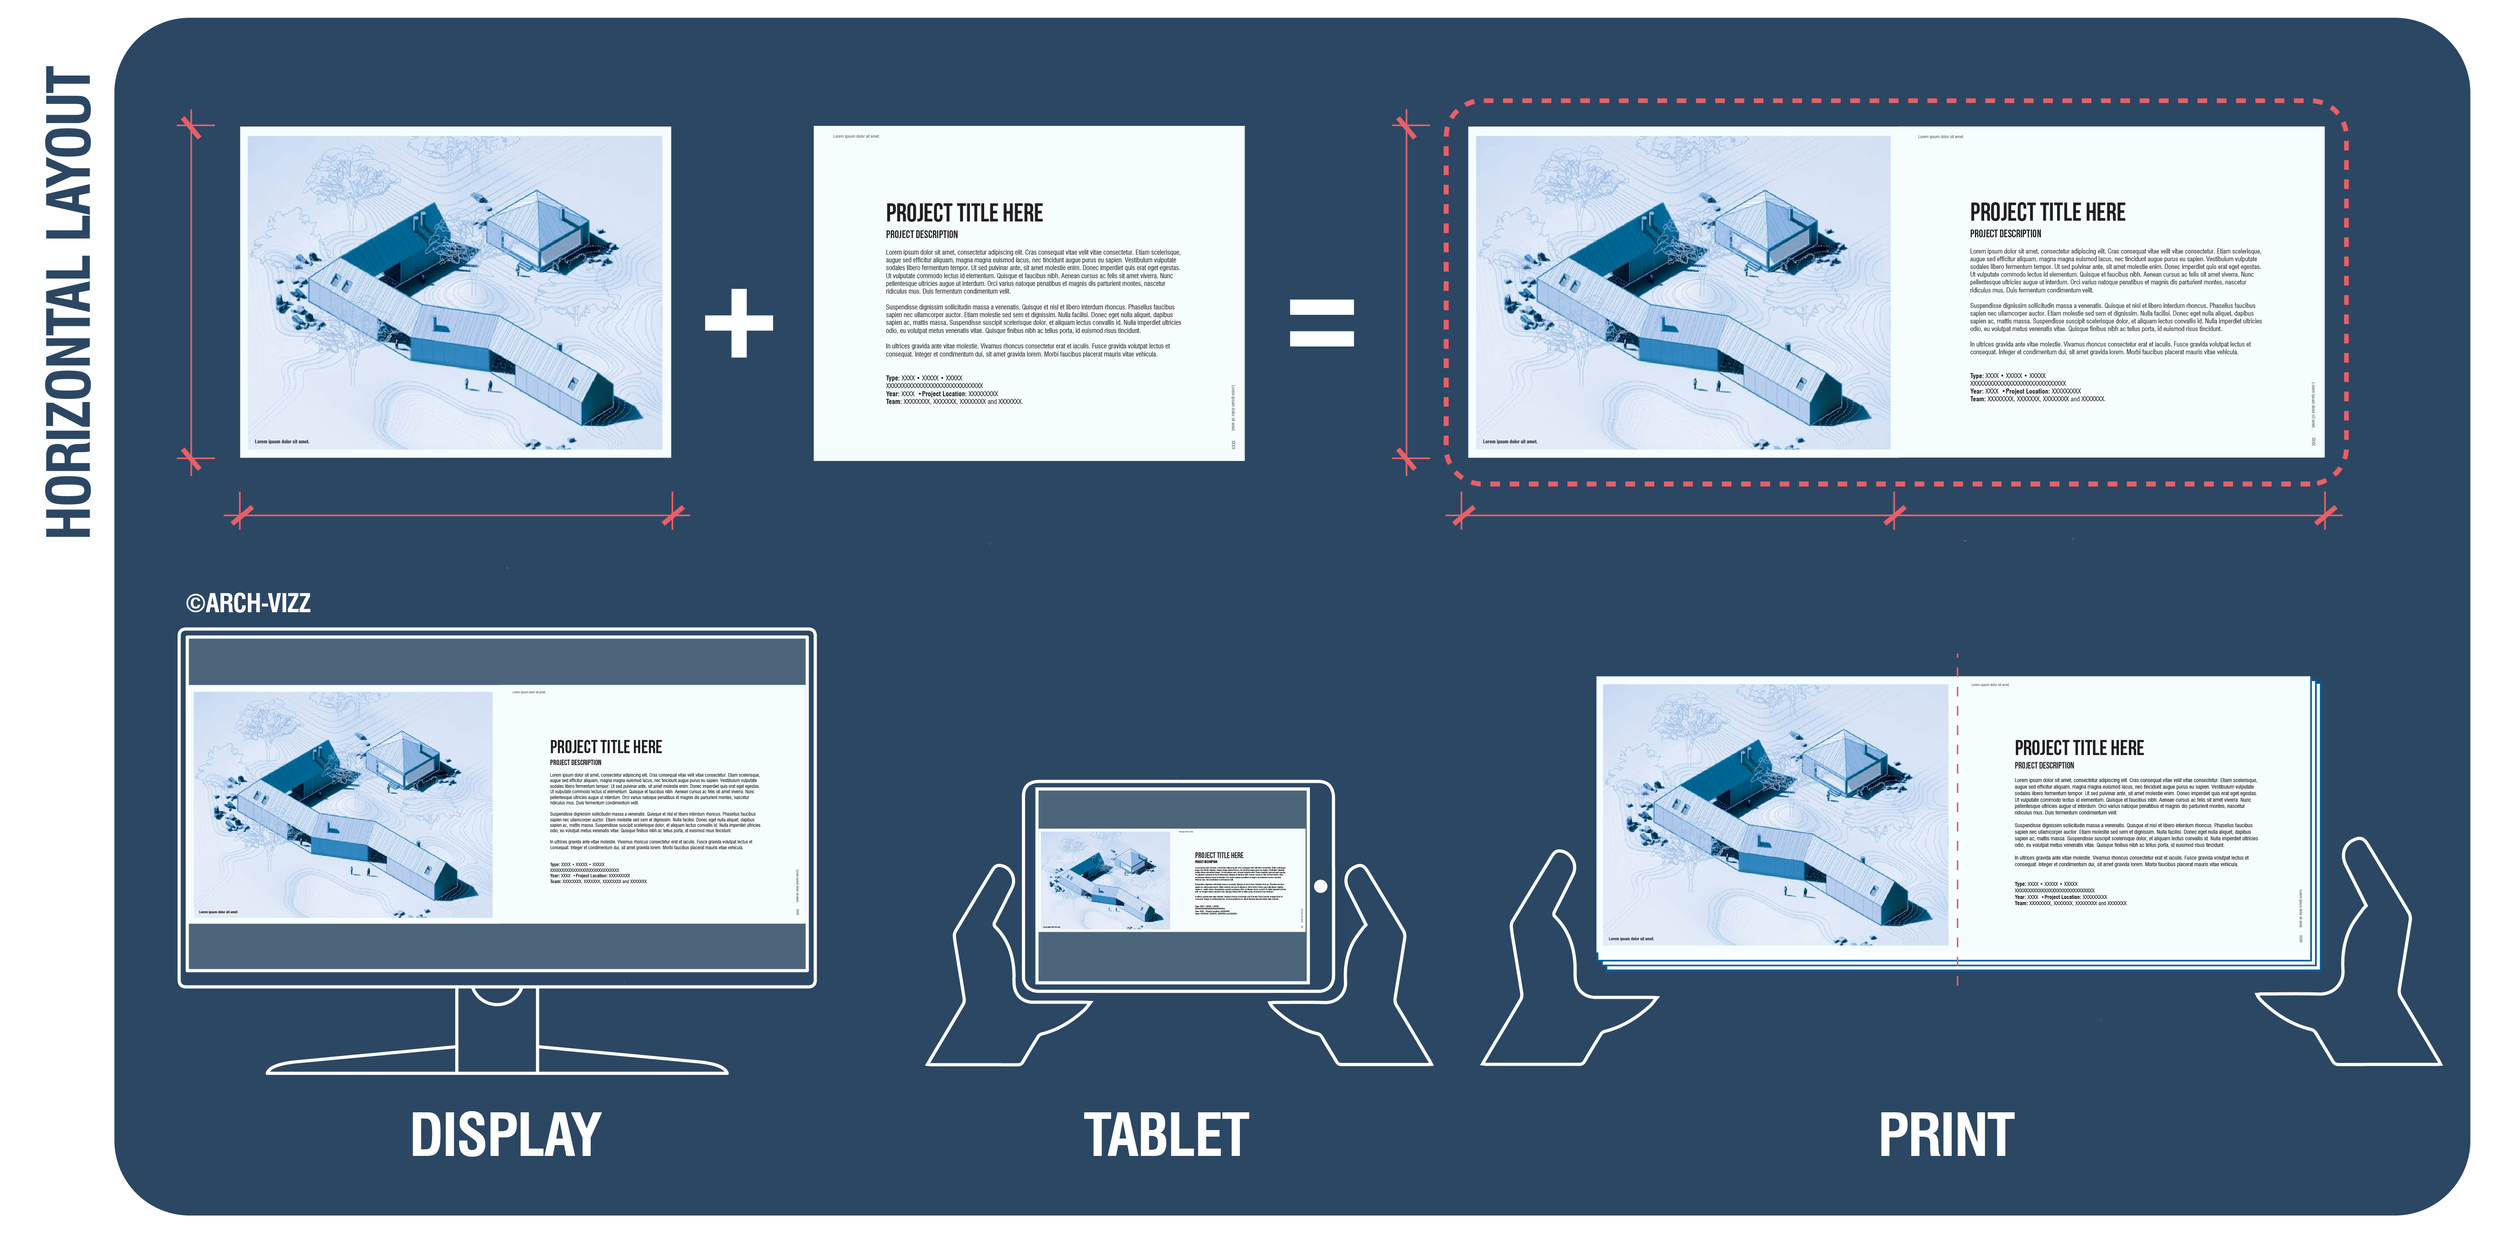
Example of Vertical vs Horizontal layouts (by ©StefaniFachini).
7. Add Captions and Context
Even the most beautiful images need context.
Briefly describe the project, your role, and the year.
Keep explanations clear and concise.
Avoid overly technical language—make it easy for anyone to understand.
Pro Tip: Think of captions as your tour guide—they should quickly highlight key points so the viewer knows exactly what they’re looking at.
8. Review and Edit
Once your first draft is done, step away for a day before reviewing.
Look for typos, misaligned elements, and low-resolution images.
Remove anything that doesn’t serve the story or show your best work.
Pro Tip: Ask for honest feedback from a peer or mentor—they’ll catch things you may have missed.
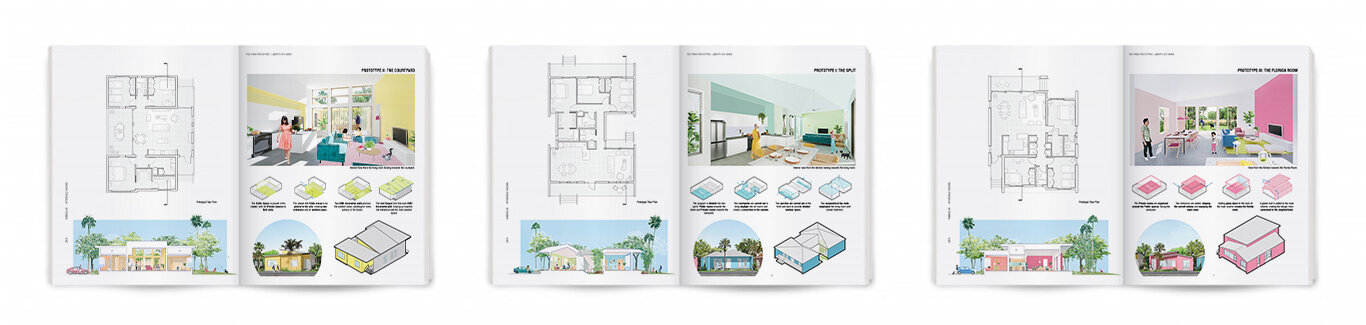
Example of a portfolio project page (by ©StefaniFachini).
9. Export and Test
Export two versions:
A high-res PDF for printing.
A compressed PDF for emailing or uploading.
Check both versions on different devices to make sure everything displays correctly.
Pro Tip: Name your file professionally—Firstname_Lastname_Portfolio_2025.pdf—it looks more polished.
10. Tailor for Each Opportunity
A one-size-fits-all portfolio rarely gets the best results.
Swap projects in or out depending on the firm, role, or competition.
Highlight work that aligns with their style or type of projects.
Adjust captions to speak to what they value most.
Pro Tip: Even small tweaks—like changing the order of projects—can make your portfolio feel custom-made for the viewer.
Final Thought:
Your portfolio isn’t static—it’s a living document. Keep refining it as you grow, and treat it like a design project in its own right. The more care you put into it, the more it will work for you.
For inspirations about portfolio layouts, don’t miss our post LEARNING FROM MAGAZINES.
Any questions or suggestions? Leave a comment!
Article by Stefani Fachini