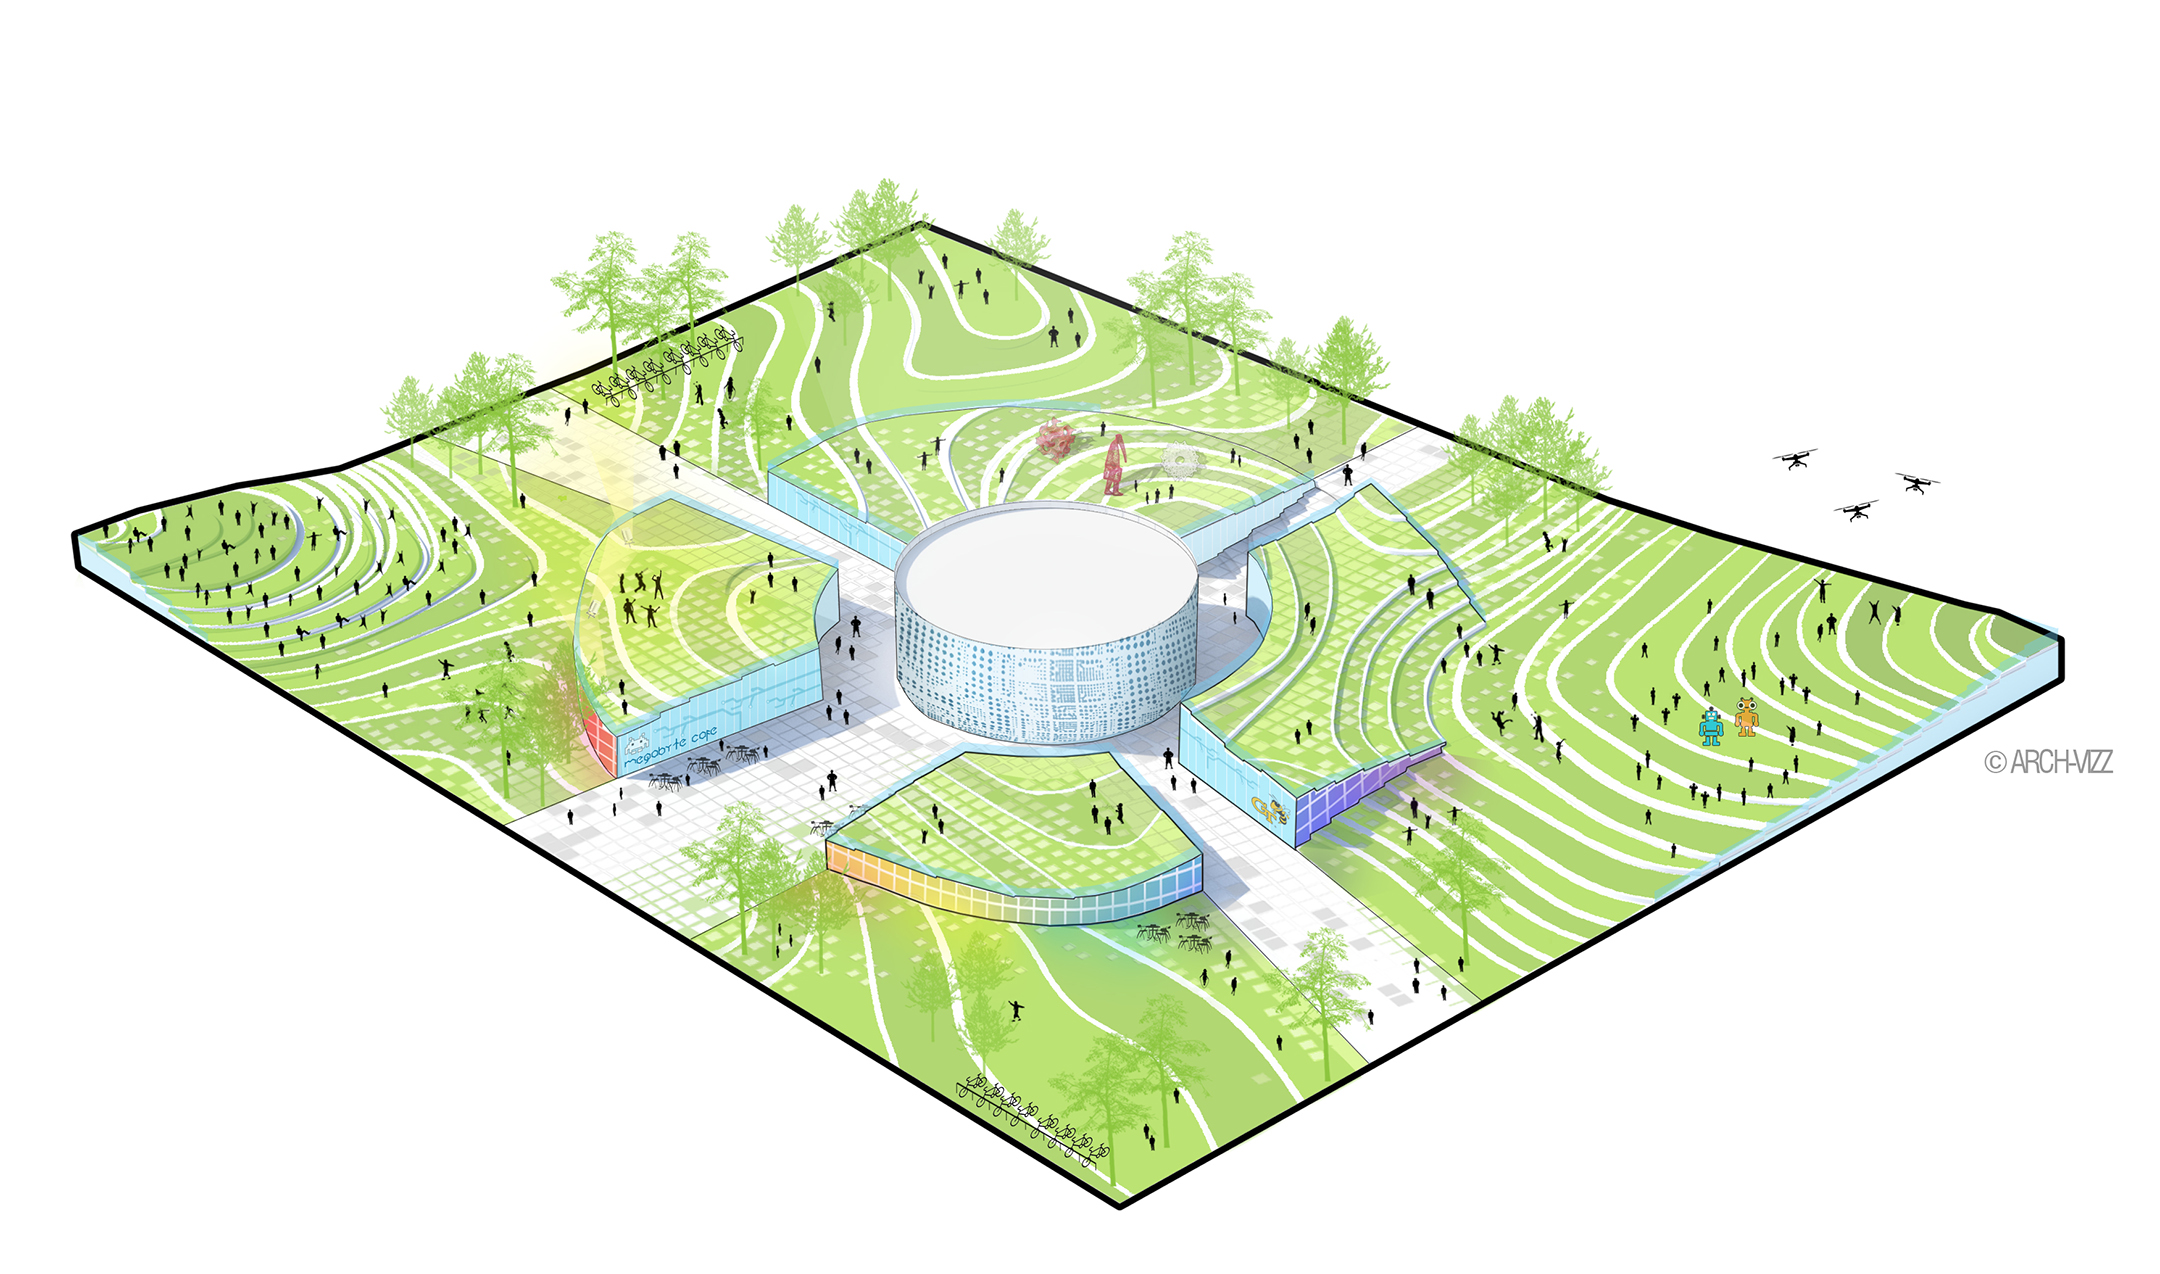
PARK DIAGRAM
BASIC WORKFLOW FOR DIAGRAMS
Diagrams are an excellent way to show the main idea behind your project. It should contain the essential information to communicate your idea. Here are a few simple steps for making clear and attractive architecture diagrams:

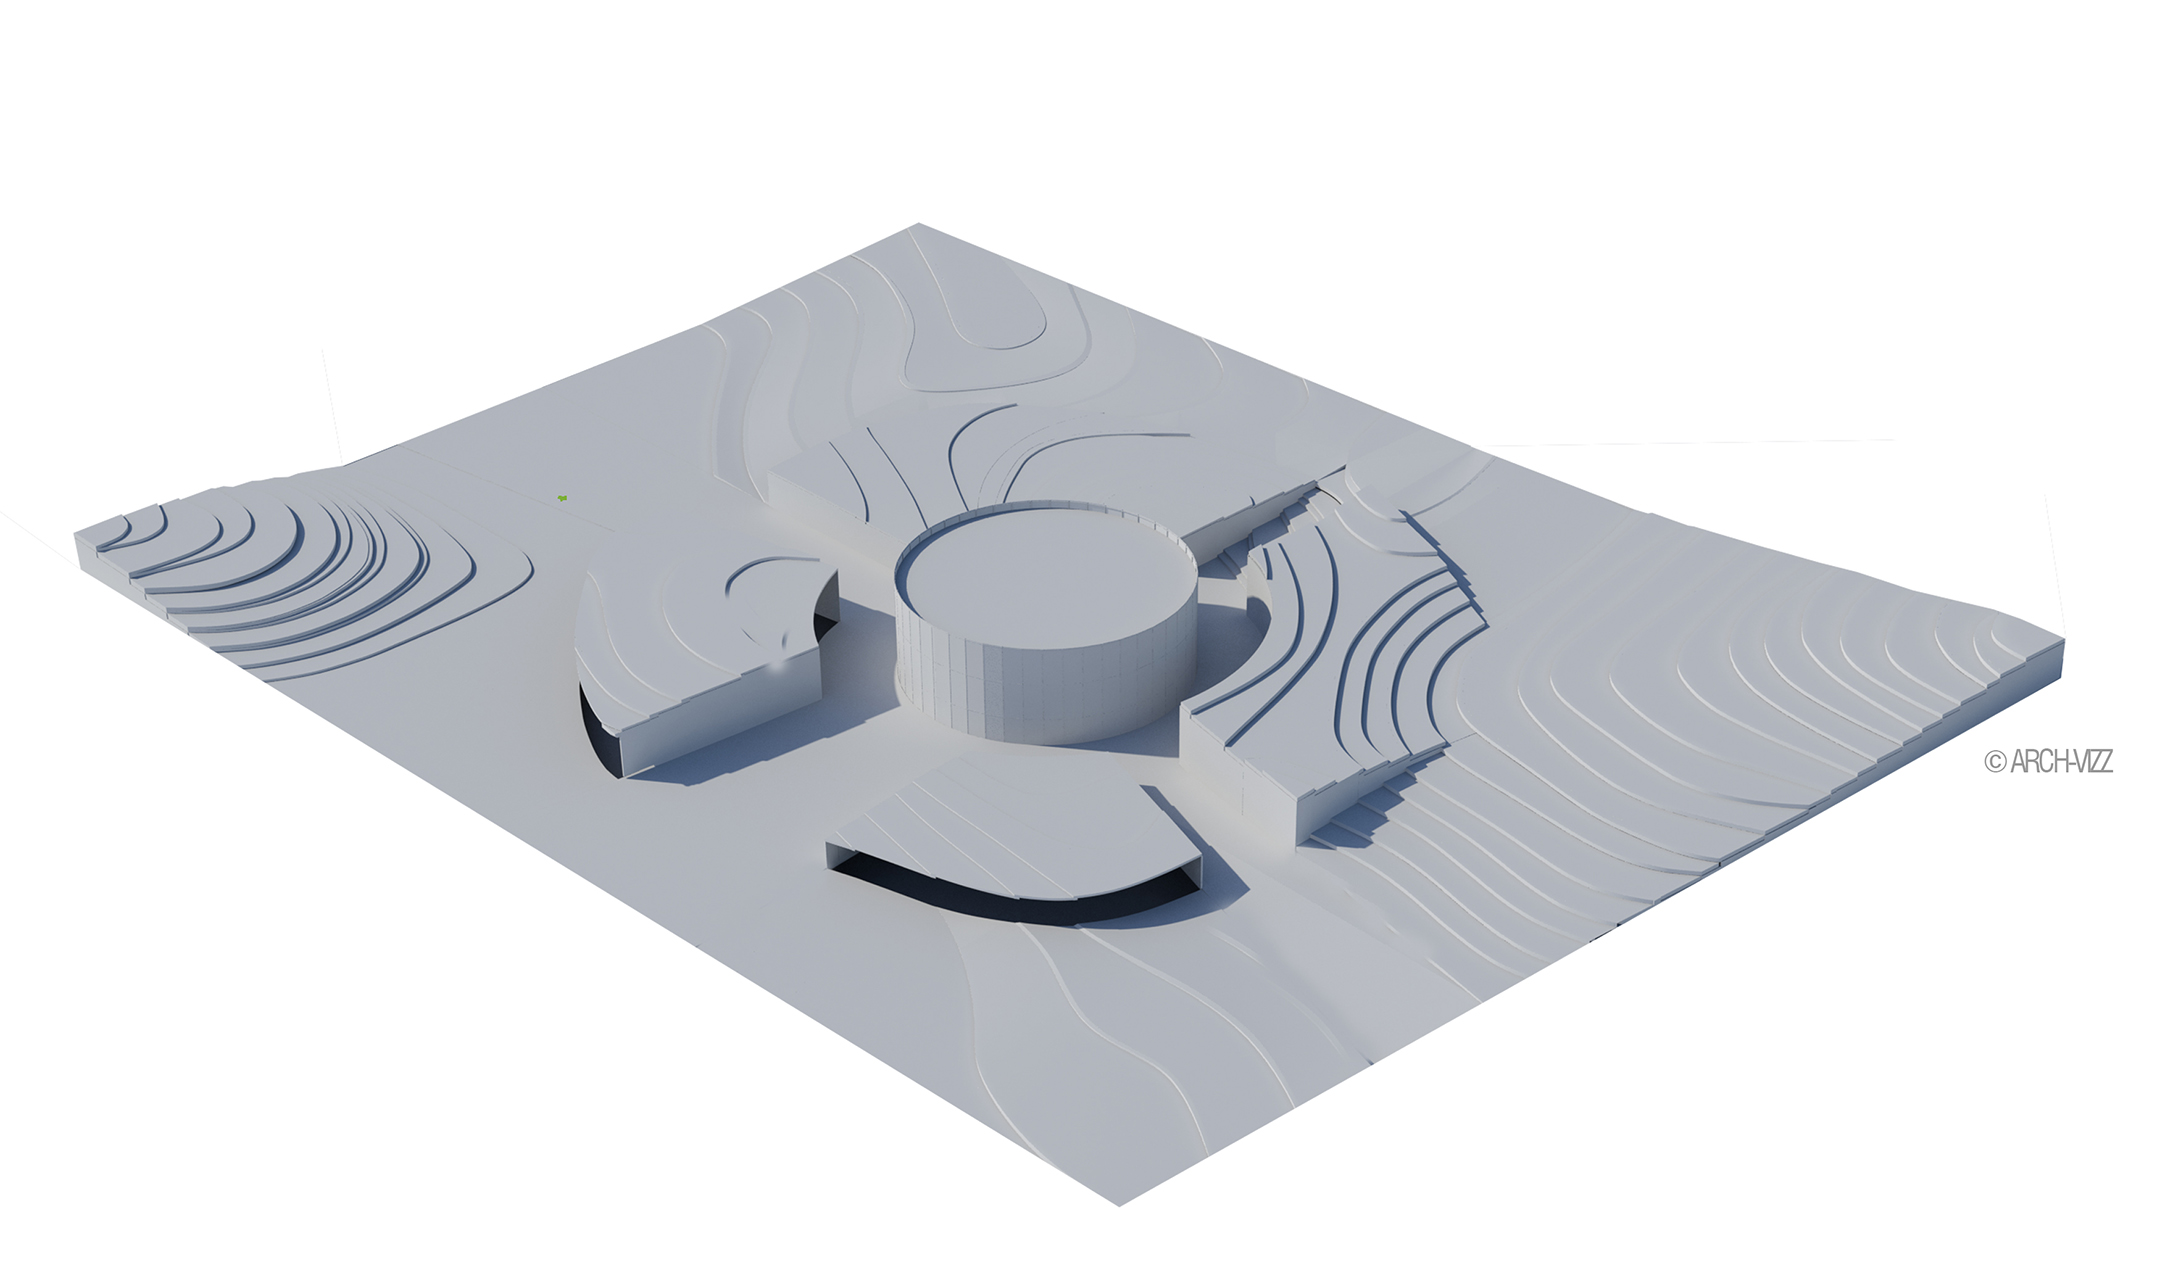
1 | Base file
For this diagram, I’ll be using a very simple clay rendering with basic lighting. I also exported a Render ID layer (V-Ray) to help me select certain areas to add colors to the image.

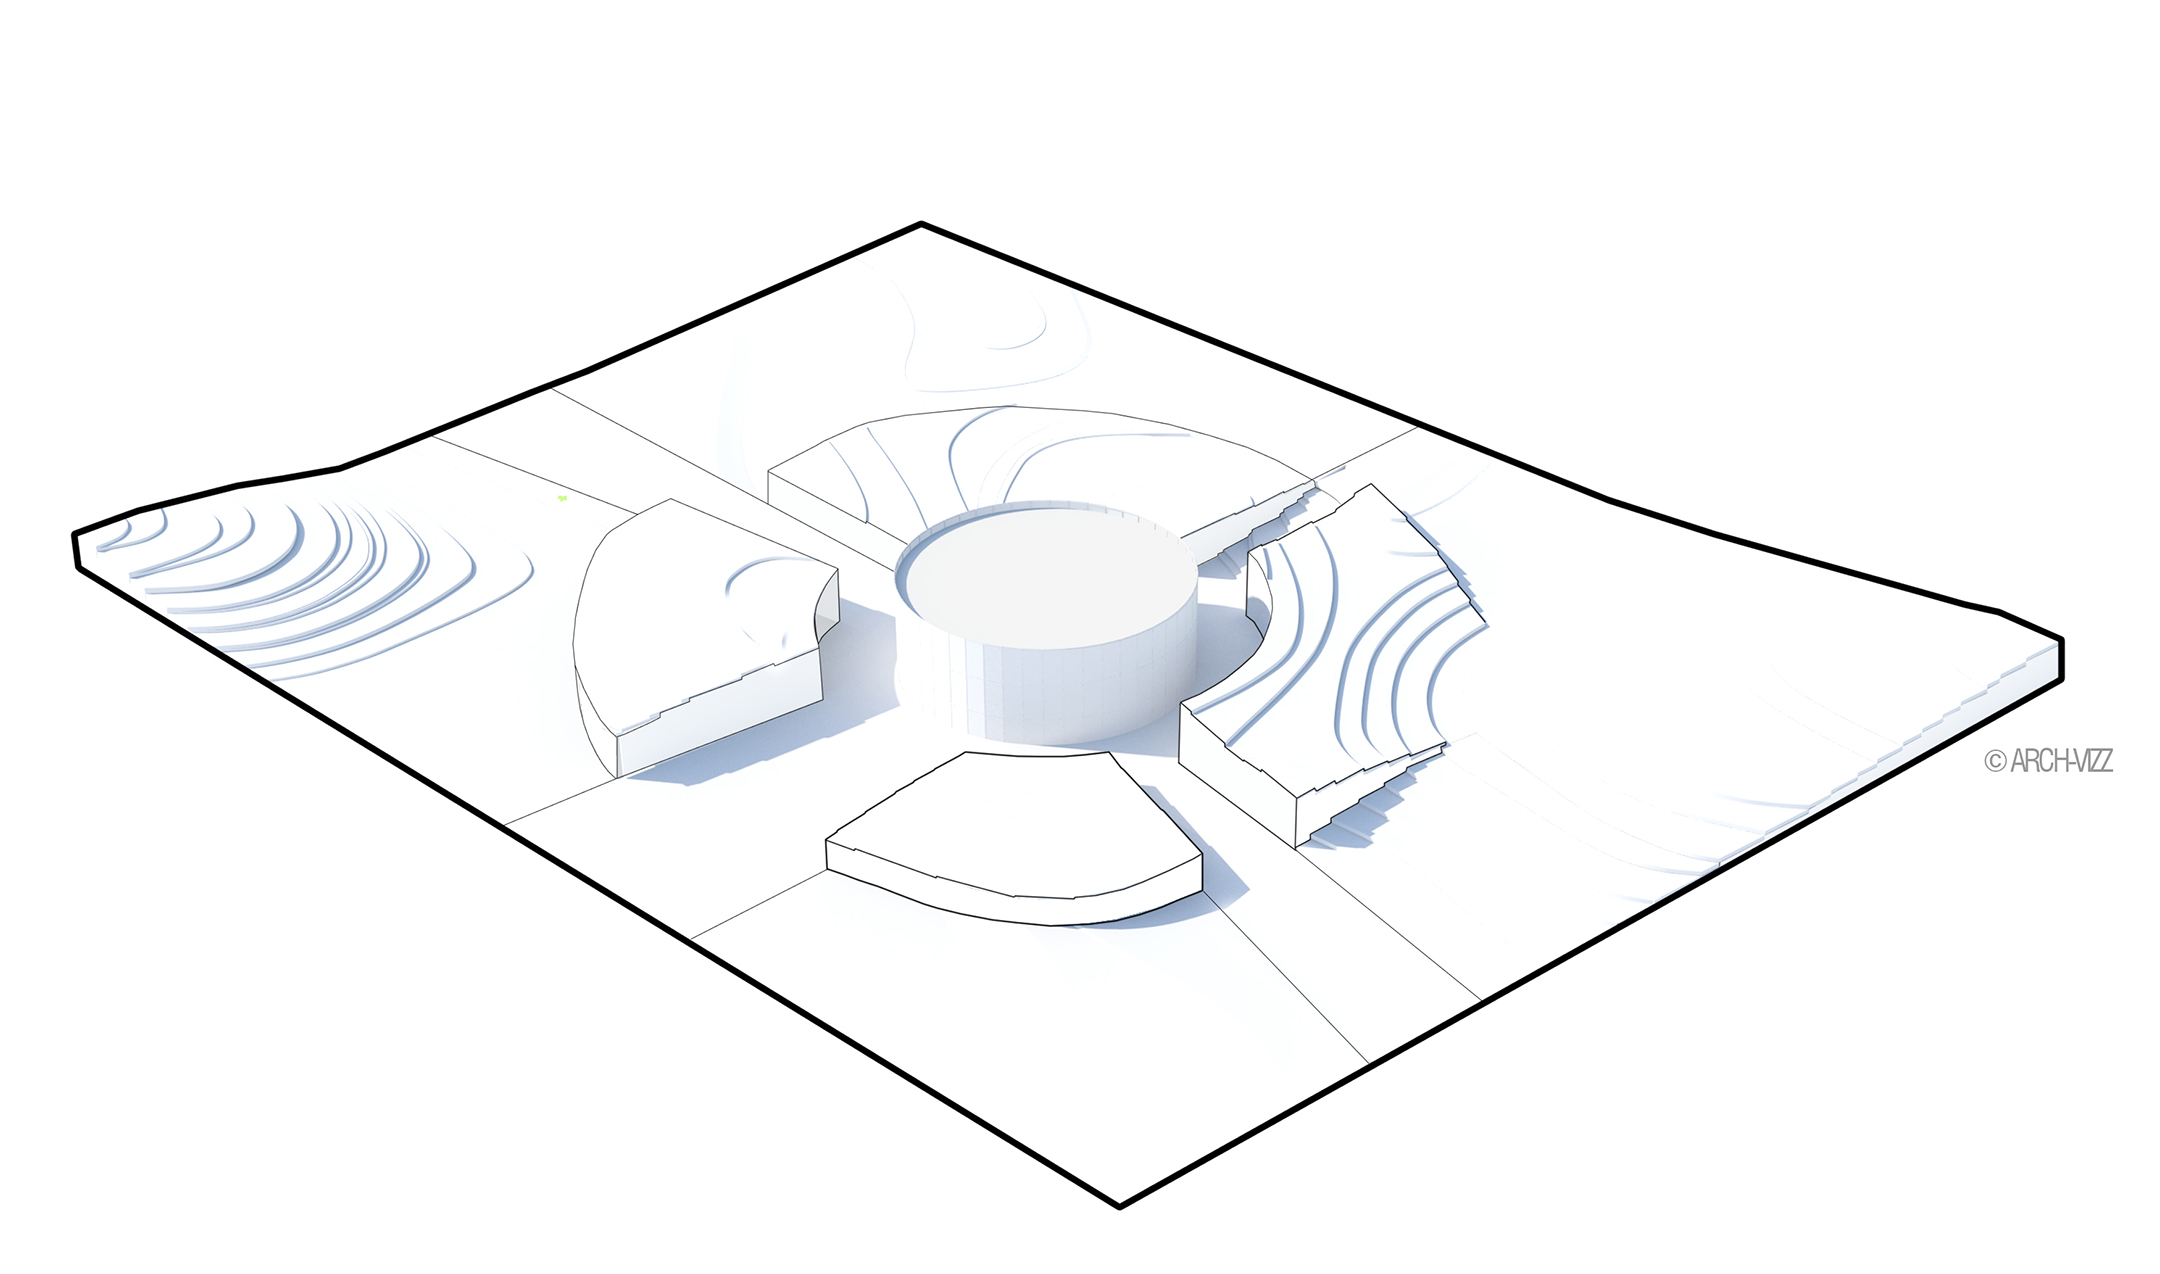
2 | Outline
I added a thicker outline to the diagram to give it a frame. In the inside, I used a thinner lineweight to show the main massing.

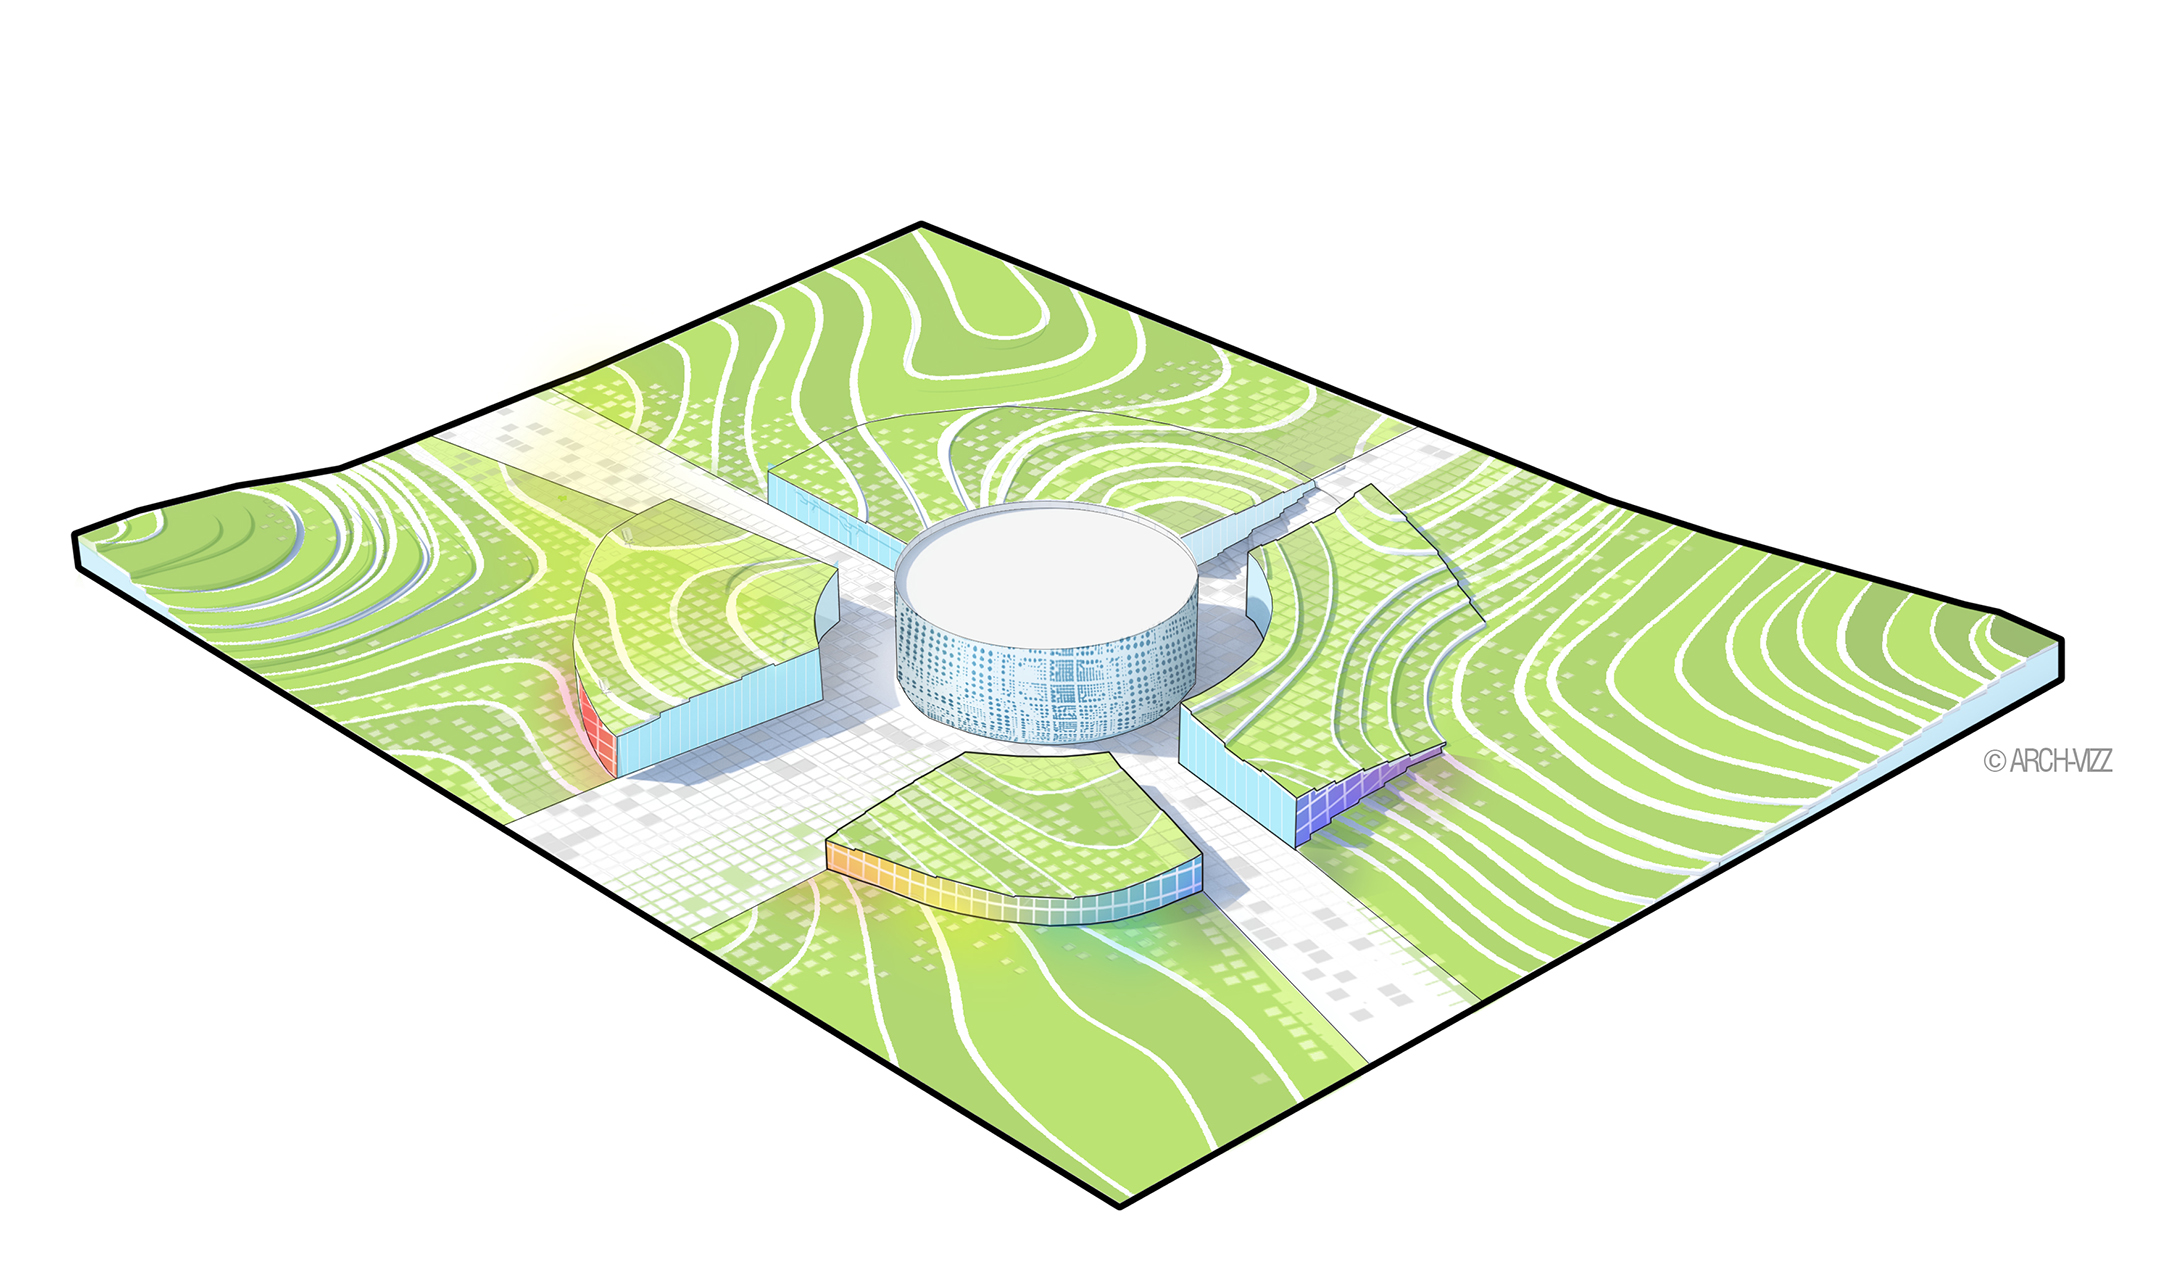
3 | Color
Adding color was a simple exercise of selecting the areas to be colored and using the paint bucket tool to color them. Next, I added a gridded texture for the paving, and a seperate texture for the walls.

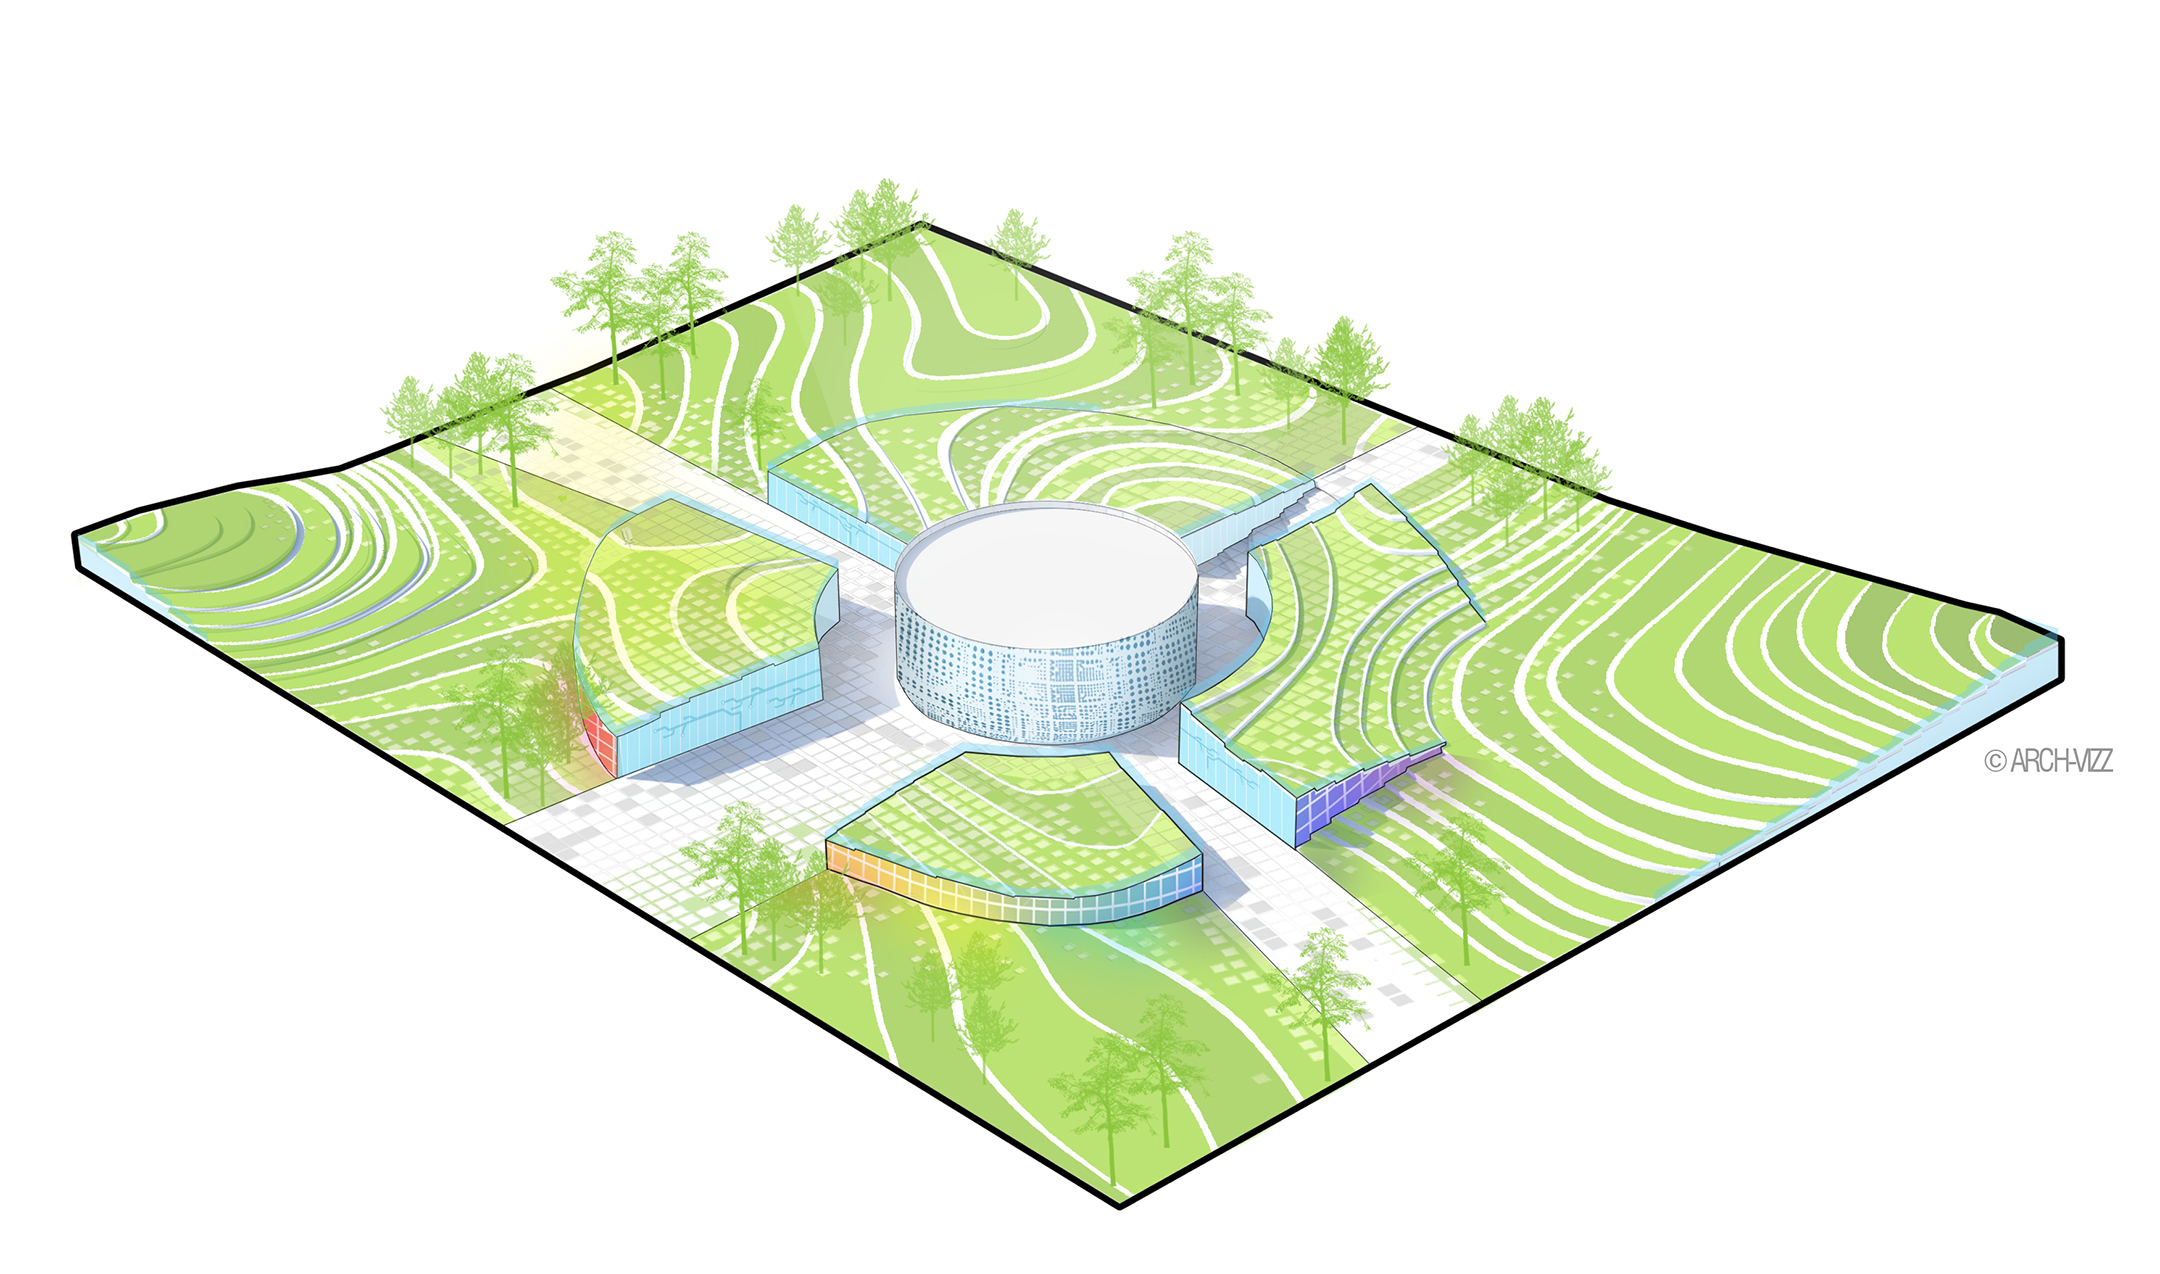
4 | Landscape
To make the diagram feel more dynamic, I used my photoshop tree brushes - sporadically breaking through the outline.

5 | Entourage
Using the same Photoshop brush technique, I added entourage to the image. I chose to use black to match the line work.

6 | Final details
This is the design proposal for a technology park, so adding drones and robots was very important to explain the main program and main idea.
It’s important to know when to stop adding detail to your diagram - this will depend on what the diagram is trying to tell. Have that in mind before you start working on it so you have a clear idea of what you want to achieve.

Here is a collection of diagrams with a similar style for you to learn even more from: Check it out on Pinterest! *
Any questions or suggestions? Leave a comment!
*These examples are for graphic inspiration only. Their contents are unrelated to this website.
Drawings and Tutorial by Stefani Fachini